SKETCH
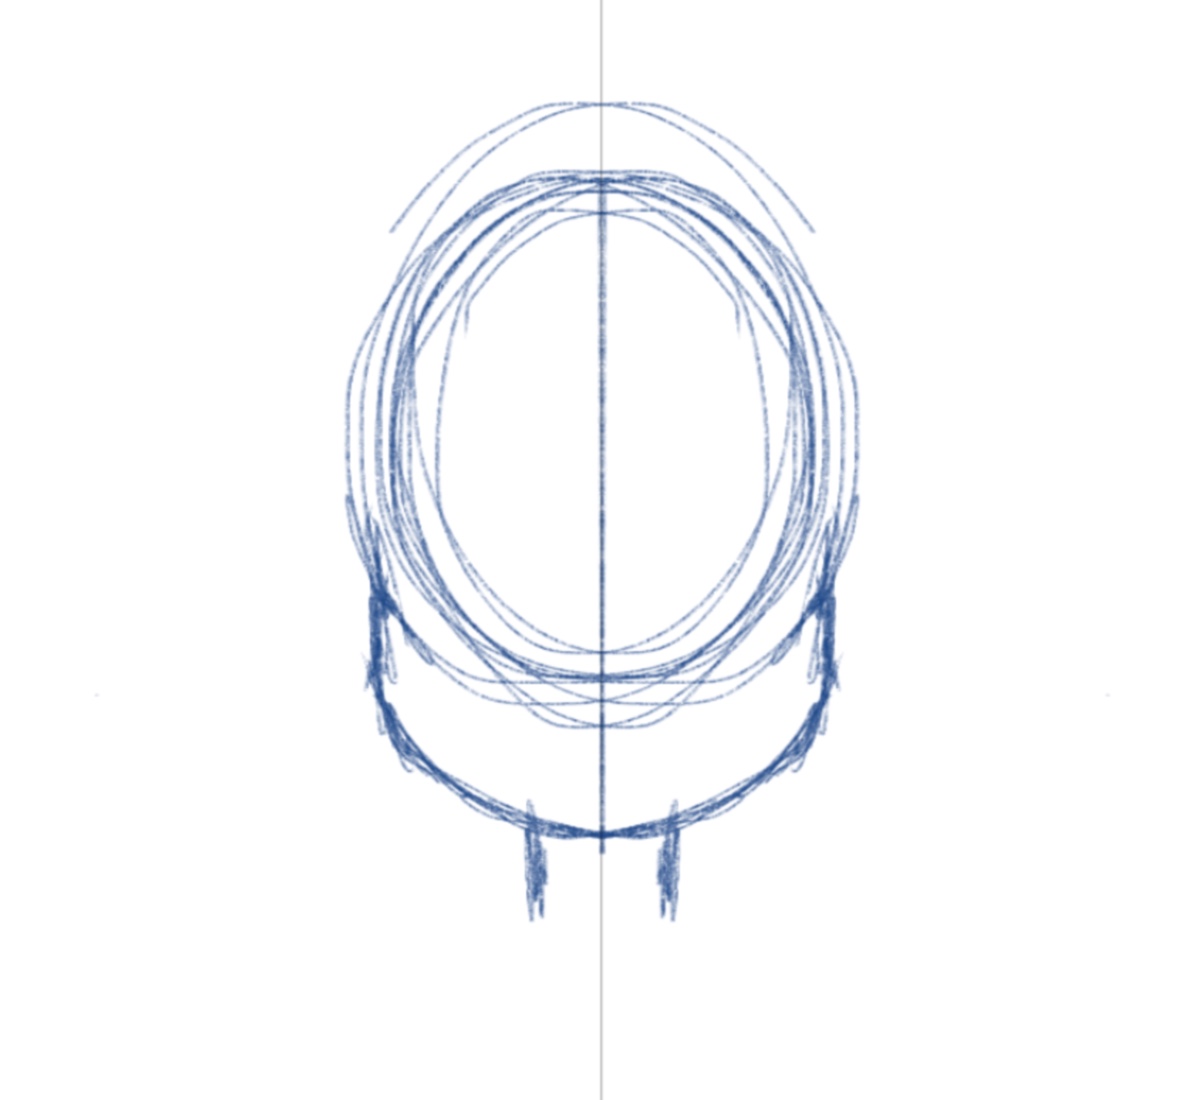
1st Step
First thing to do is to create a circle. Add a line in the middle. Make sure to extend the line a bit downwards. Create the jaw. Start from the side of the circle. Then make the lines meet up in the middle.
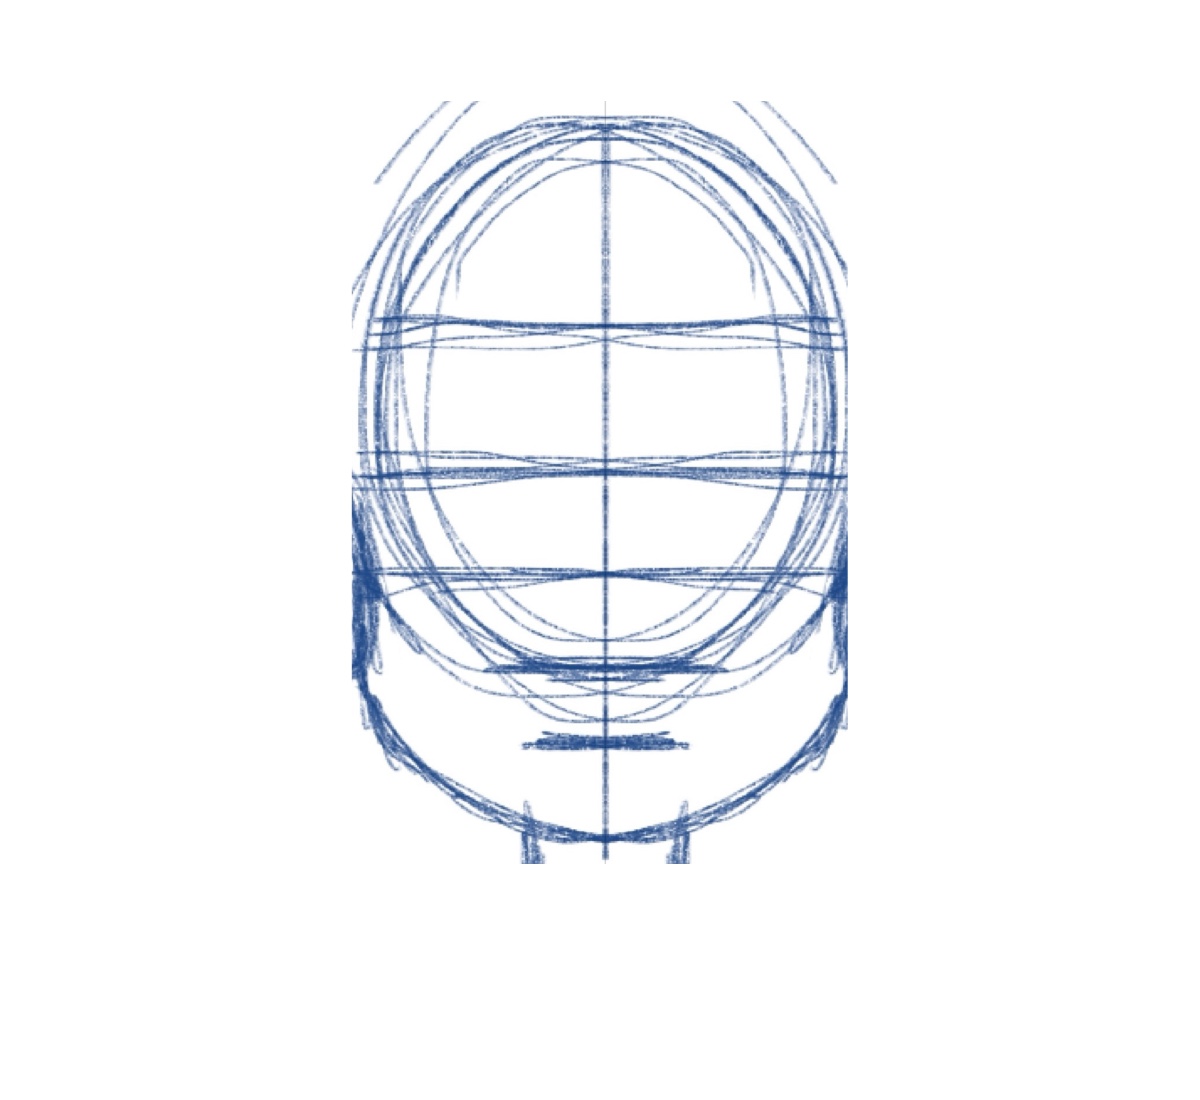
2nd Step
For the face, add a line in the middle of the circle. That is where the eyebrows will be drawn on. Then add another line on the top of the eyebrow line for the hairline. Add a line below of the eyebrow line. But this time, place it at the bottom of the circle. This will be the guideline for the nose. Add another line below again. This is where the lips will be placed. It should only be in the middle of the line for the nose and the chin.
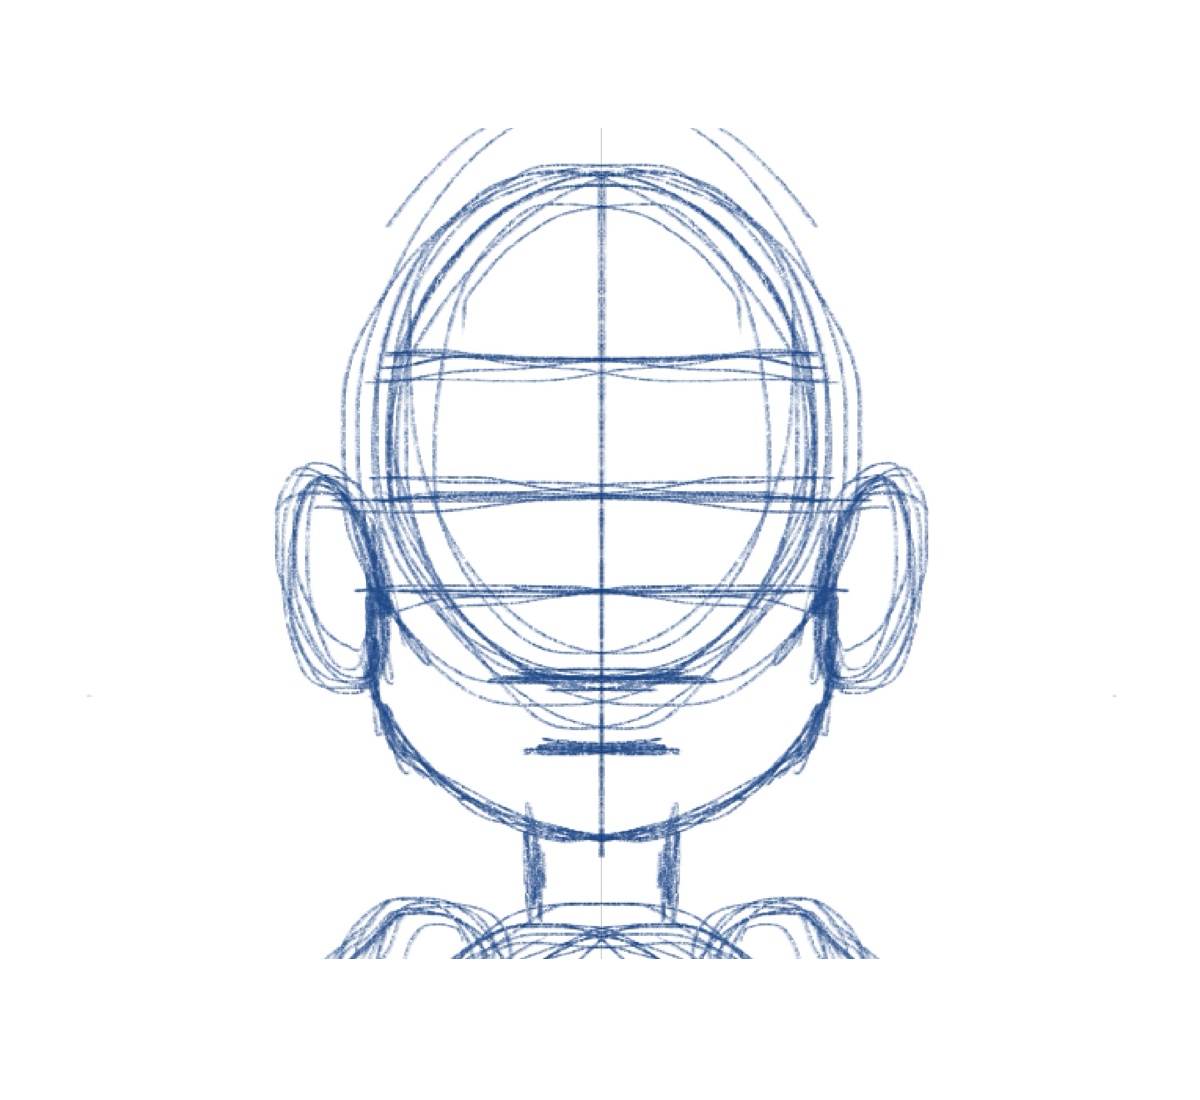
3rd Step
Add two oval on the side of the head. Place it on the first two lines on the face. The line for the eyebrow and the line for the nose.
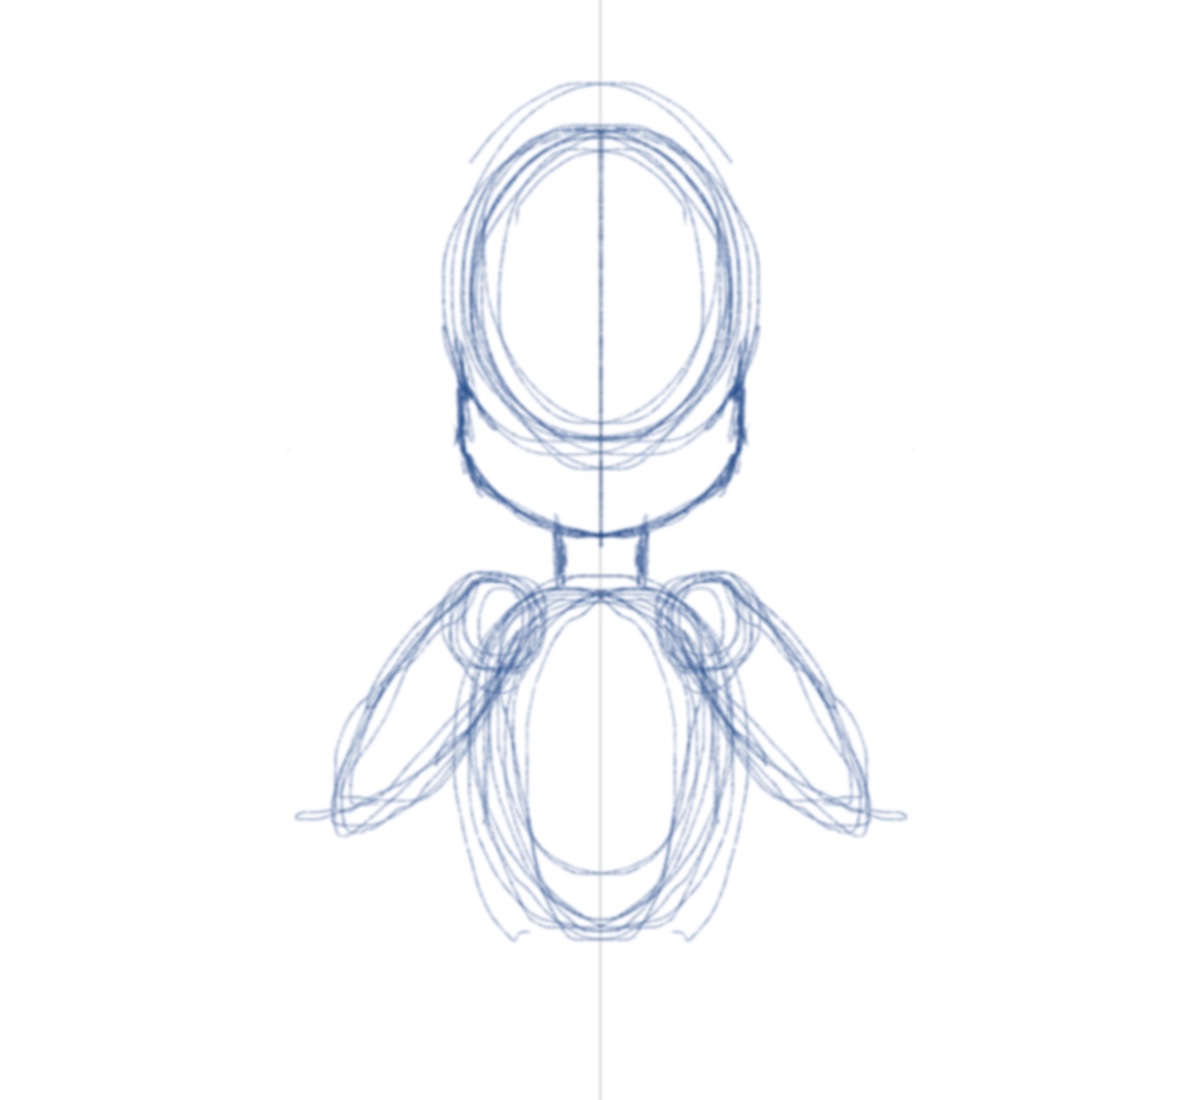
4th Step
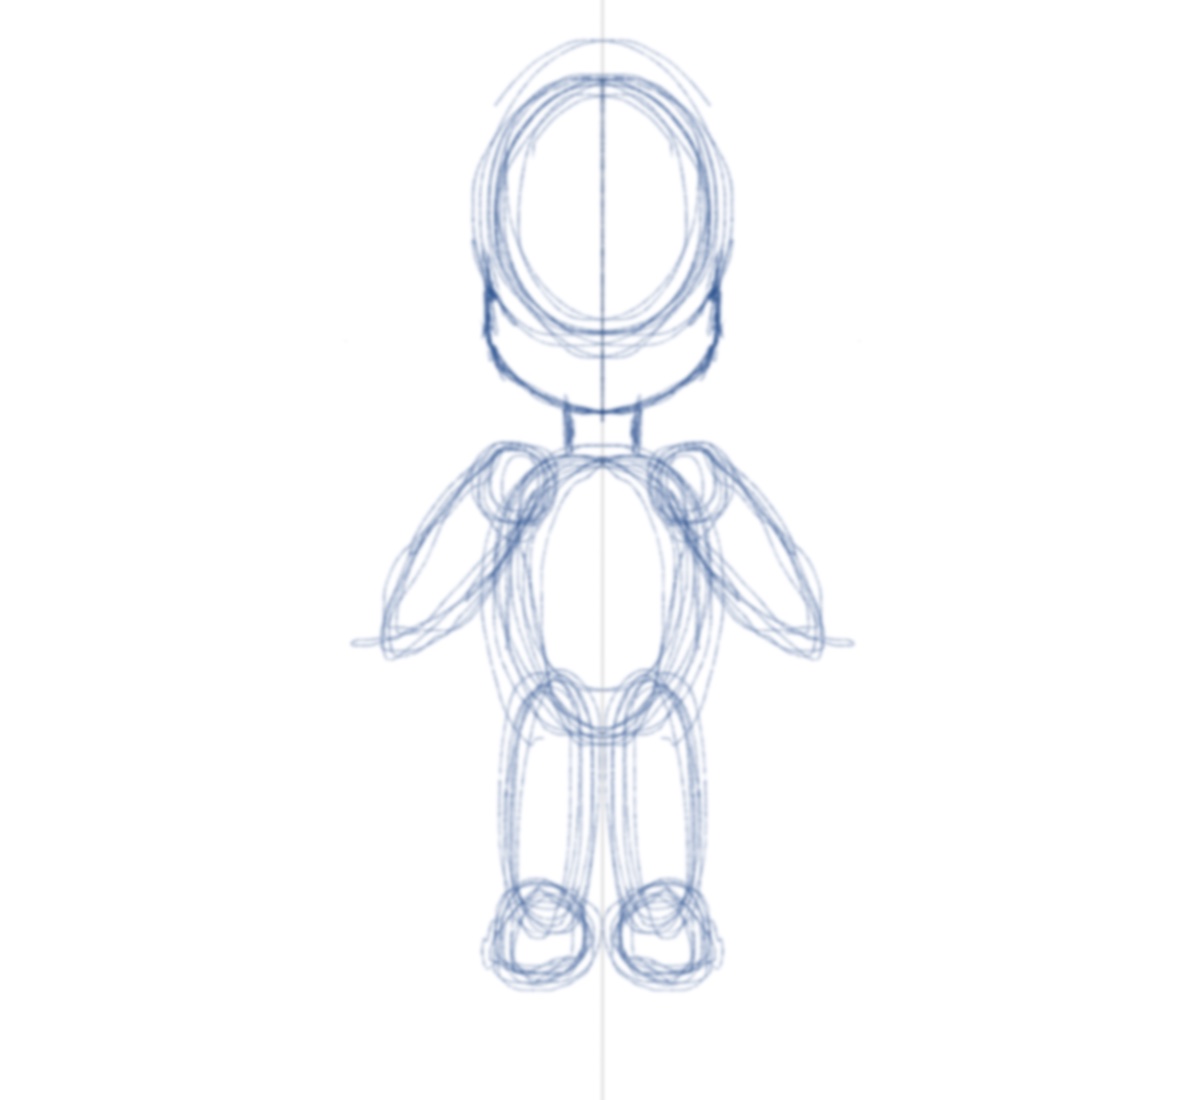
For the upper body, add two vertical lines below the head. This will be the neck. Draw an oval shape for the body. Draw two circles on the upper sides of the oval. This will be for the shoulders. Add two long ovals where the shoulders are. These are the arms of our chibi character.
5th Step
For the lower body, add another two long ovals on the bottom part of the body. These are the legs. Draw two circles on the bottom part of the legs. These are the feet or the shoes.
6th Step
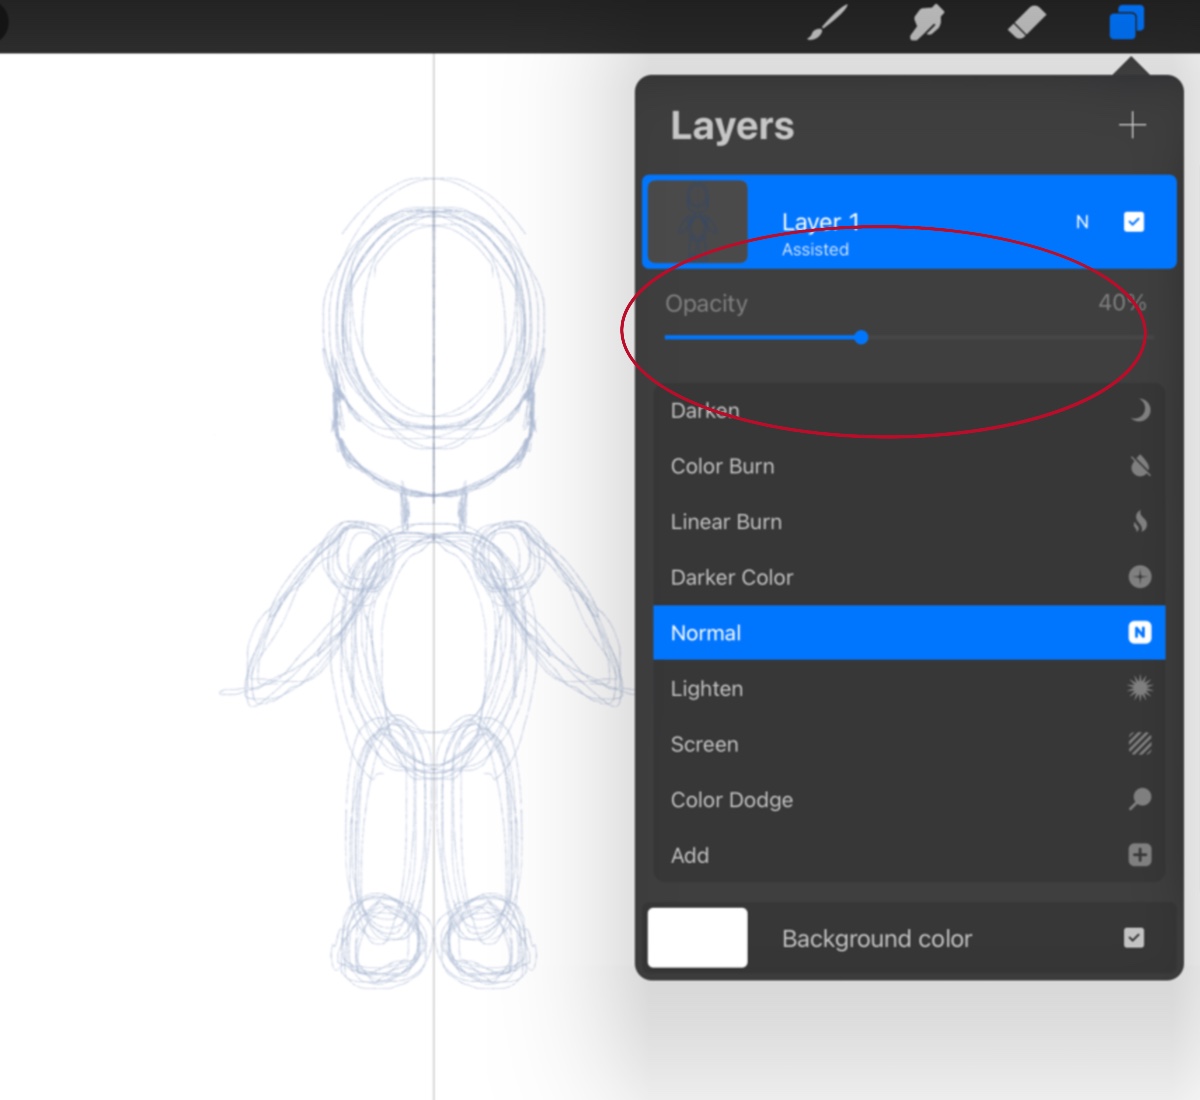
Lower the opacity of the layer. If you are drawing traditionally, erase the sketch lightly. So you can still see the guidelines. The next step will be a more detailed one. Create a new layer. Also use a new color for the pencil. This is to ensure that you will not be confused with the first sketch.
7th Step
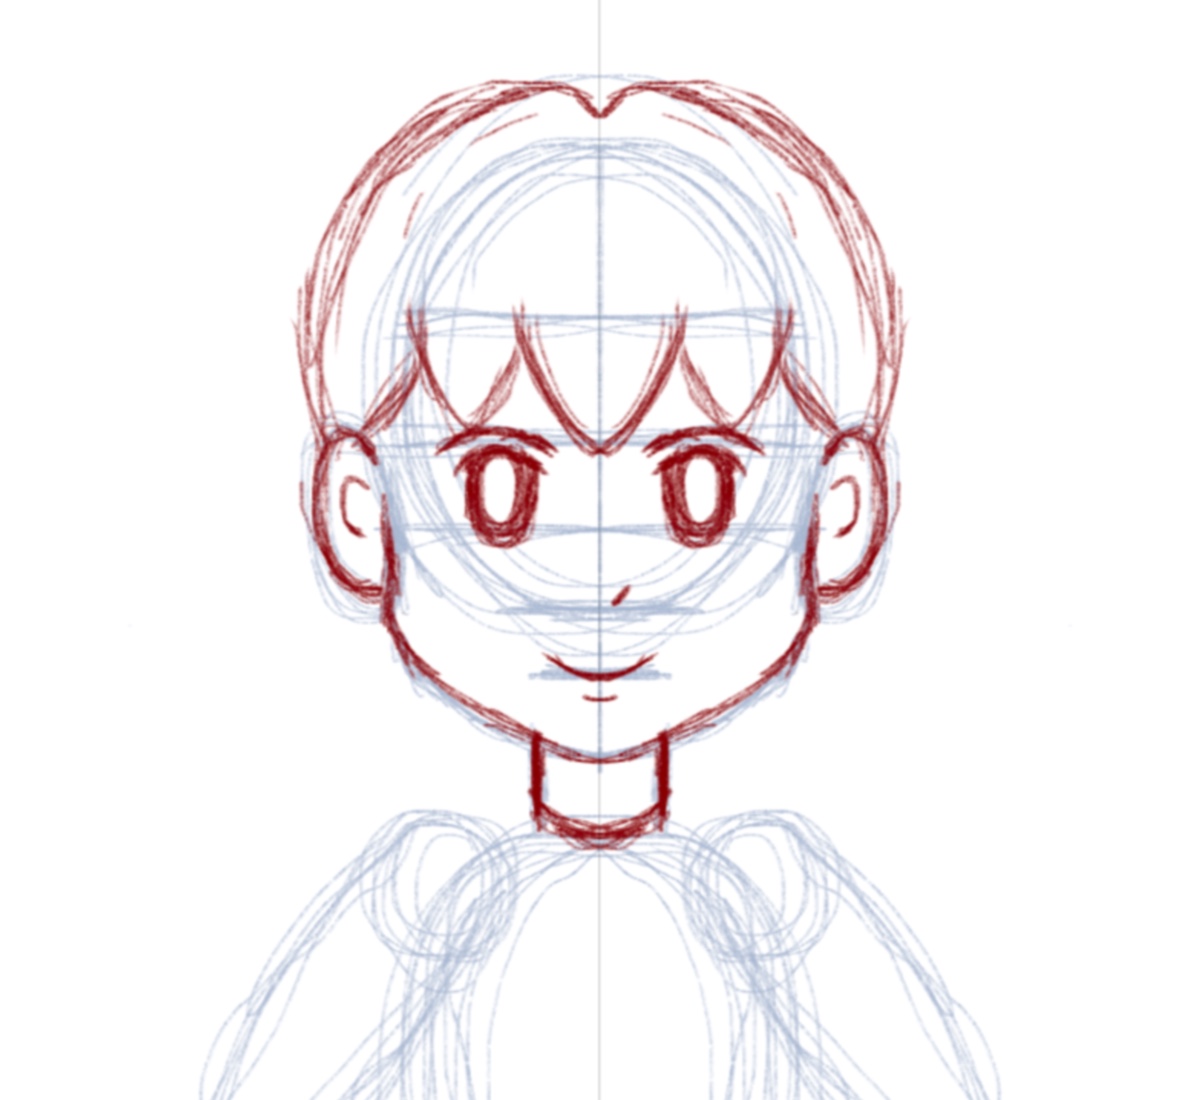
On drawing the face, first, add the eyebrows. Add the eyes. For the nose, just draw a slanted line. Then add a smile. Also draw a small curve line below the smile. This is the bottom lip. Next, just trace the jaw and the ears. And for the ears, add a small curved line. For the hair just draw a curvy v shape for the bangs. Make sure to draw it on the hairline guideline. Then, draw a curved line. Starting from the top of the head and ending it on the top of the ears.
8th Step
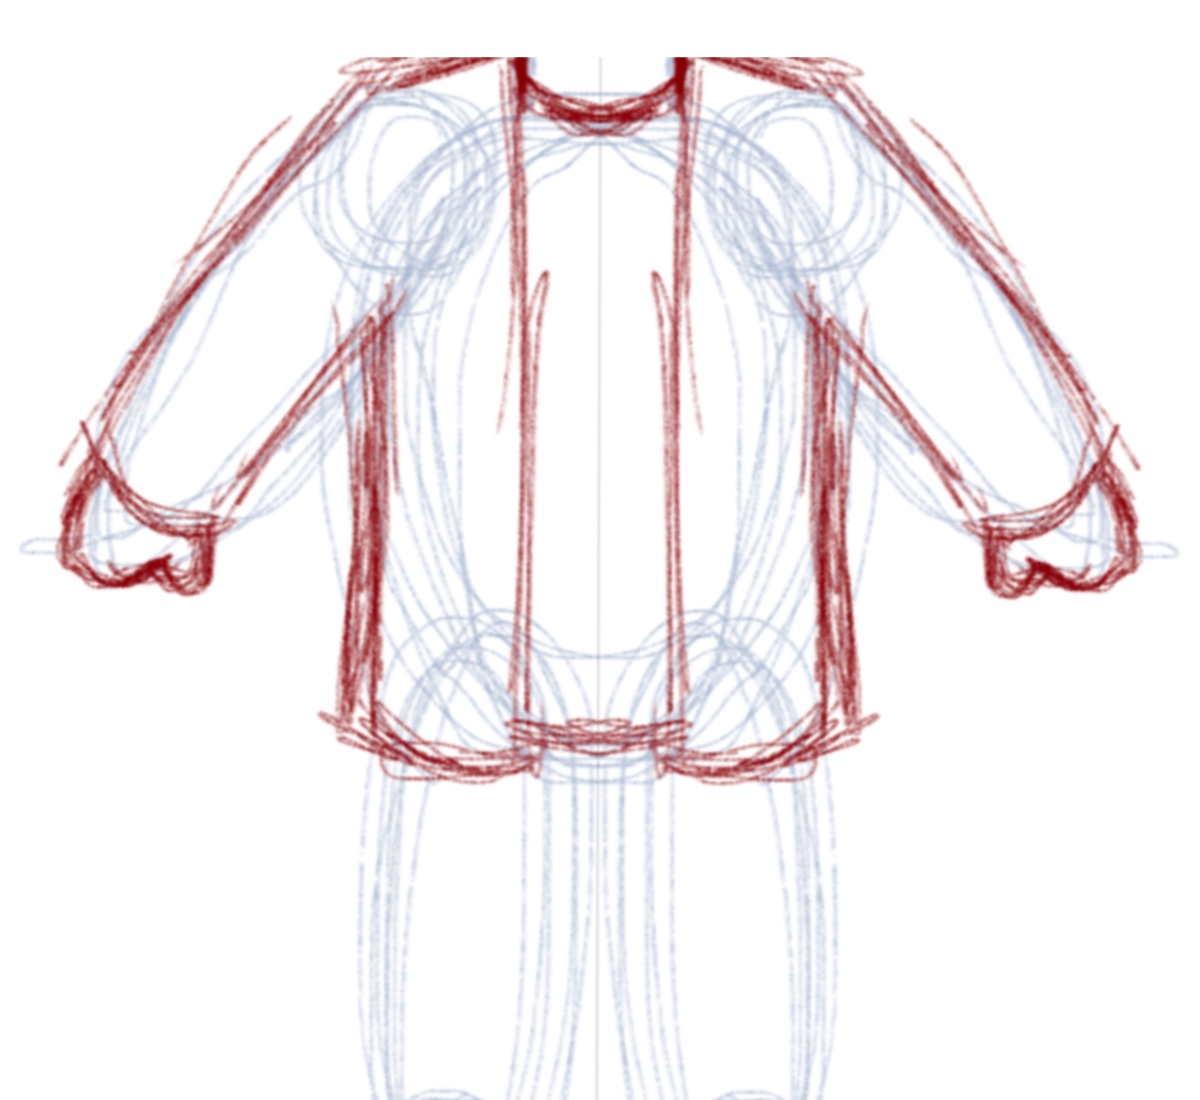
For the upper body, draw a vertical line from the neck to below the waist of the character. Then draw lines for the shoulder. Add a bit curved lines for the arms and more lines to create a jacket and shirt. For the hands just follow the shape of the guideline. And add a small oblong on the side of the hand for the thumbs. Keep in mind the hands will be facing the back. Therefore, the thumbs should be drawn on the inside and not outwards
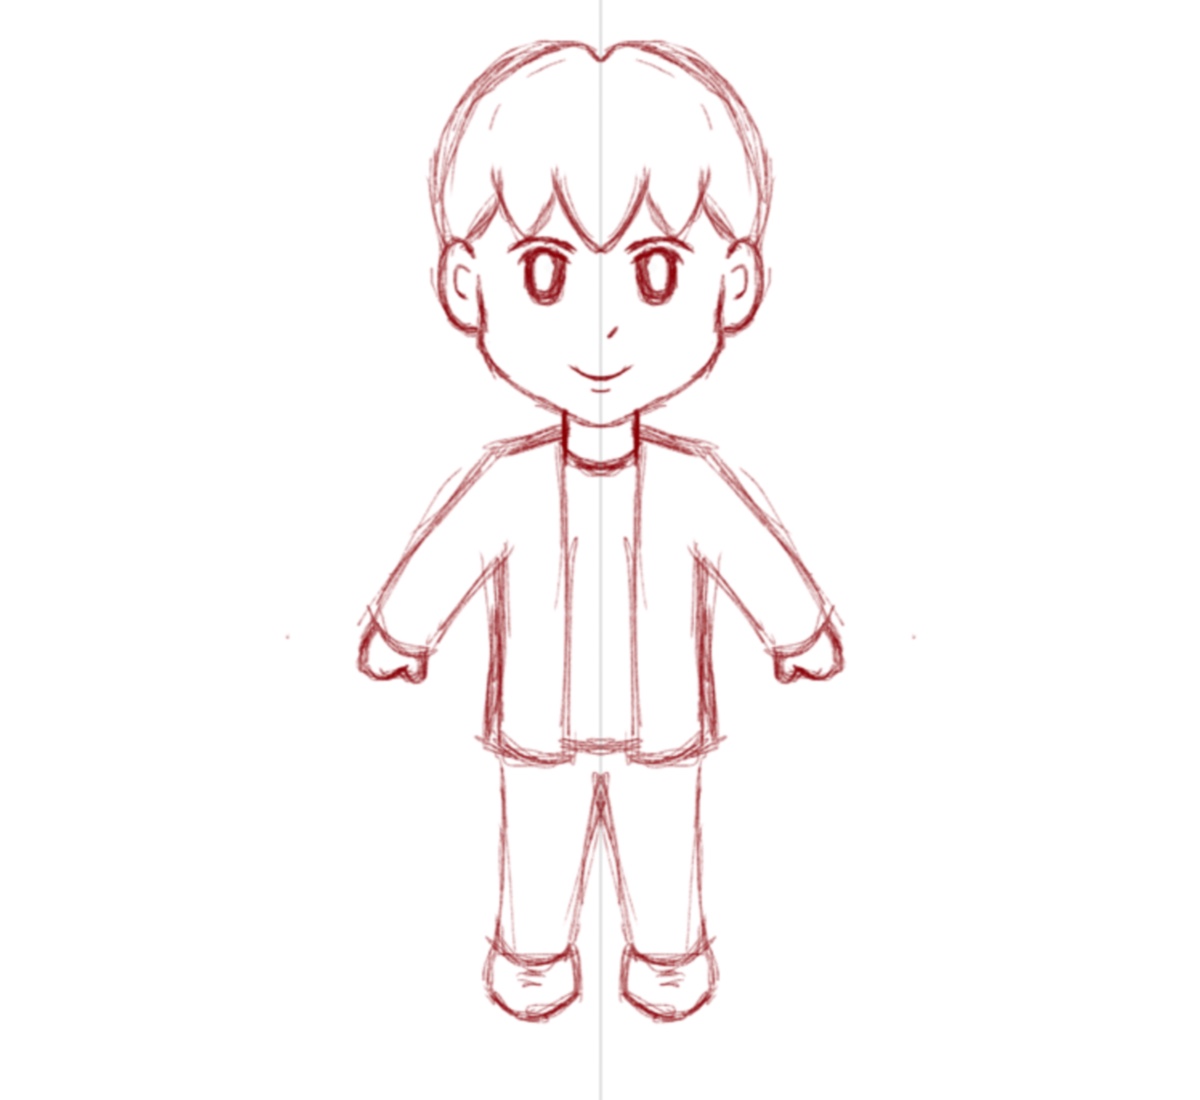
9th Step
For the lower body, just simply follow the guidelines for the pants and shoes. Also, draw two curved lines for the shoelaces.